February 9, 2017

Heart Shaped Ninja Turtle Craft

Heart Shaped Ninja Turtle Craft

Brought To You By:


  • Supplies:
    • Colored Construction Paper
    • Kids Safety Scissors
    • Glue
    • Hole Puncher
    • Black Sharpie

  • Directions
    1. Cut a number of green hearts along with strips of colorful paper for the masks.
    2. Punch a number of giant eyes with a circle hole puncher (you could also use googly eyes, if you have them).
    3. Glue the masks onto each of the turtles.
    4. Glue smaller strips of paper to the back to represent the mask's knots.
    5. Add a couple giant eyes and your Ninja Turtle is complete!


Happy Valentine’s Day!!

February 2, 2017

DIY: Pool Noodle Race Track

DIY: Pool Noodle Race Track

Brought To You By:


  • Supplies:
    • Pool Noodle
    • Serrated Knife
    • Toothpicks
    • Nose pliers
    • Cardstock
    • Glue
  • Directions:
      1. Cut the noodle in half with a serrated knife (one side than the other side).
      2. Once the noodle has been cut, lay the pieces on the ground side by side.
      3. Insert the toothpicks where the two halves of the foam noodles touch each other.
      4. Use as many toothpicks as you need to hold the noodle tracks tightly together.
      5. Then, with a need nose pliers, clip the ends of the tooth picks flush to the noodle.
      6. Finally, you are ready to decorate your track! Use the cardstock to create race flags to go along the track, as well as, your start and finish line.


On Your Mark...Get Set...Go!!


January 26, 2017

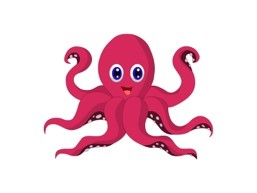
Cupcake Liner Octopus

Cupcake Liner Octopus
Brought to you by:


Materials:
  • Purple cupcake liner (or any color you would like)
  • Blue sheet of cardstock paper
  • Purple cardstock paper
  • 2 large googly eyes
  • Cheerios
  • Glue
  • Scissors
  • Kwik Stix
Directions:
  1. Start by cutting out 8 Octopus tentacles from your purple cardstock paper. They should be roughly the width of a Cheerio.
  2. Glue your purple cupcake liner and tentacles onto the blue cardstock paper.
  3. Cut a mouth out of the pink cardstock paper and then glue it onto your Octopus
  4. Next, glue on the googly eyes!
  5. Add spots of glue to the tentacles so that you can add the Cheerios.
  6. To finish your Octopus project, use Kwik Stix to add waves and different under the sea friends around your Octopus!


Life is better under the sea!

January 19, 2017

Popsicle Stick Minions

Popsicle Stick Minions
Brought to you by:


Materials:
  • Popsicle sticks
  • Glue
  • Yellow Kwik Stix
  • Scissors
  • Black/Gray/White Cardstock
Directions:
  1. The first step is to assemble the base of your minions. To do this, glue your popsicle sticks together to look like a fence. Set this aside for 20-30 minutes to let it dry completely.
  2. Next, paint the front of the popsicle sticks with the yellow KwikStix.
  3. Now cut out the cardstock embellishments to bring the minion pieces to life.
  4. To finish up your minion, glue on the cut out paper embellishments and let it all dry completely!


January 12, 2017

Gluten Free Popcorn Ball Treat

Gluten Free Popcorn Balls
Brought to you by:

The easiest popcorn balls ever! Easy as 1-2-3!

Ingredients:
  • 6 cups of popped popcorn
  • 3 tbsp. of butter
  • 1 (8 oz) package of marshmallows

Directions:
  1. Melt the butter in a pan and add the marshmallows.
  2. Take off the stove and add the popped popcorn.
  3. Stir.
  4. Let the mixture sit until it is cold to the touch.
  5. Butter up your hands and form the popcorn balls.
  6. Enjoy!


January 5, 2017

Paper Plate Elephant

Paper Plate Elephant
Brought to you by:


Materials:
  • Paper Plate
  • Scissors
  • Glue
  • White Paper
  • Black Marker
  • KwikStix
Directions:
  1. First, cut the paper plate to look like the image above.
  2. Paint each part with any color Kwik Stix you would like.
  3. Using the white paper and black marker, cut out and create two eyes then glue them in the upper area of the center piece of the plate.
  4. Finally, use the last portion of the plate that was not used to create a trunk for your elephant!


December 29, 2016

New Year's Noise Maker

New Year's Noise Maker
Brought to you by:


Get ready to ring in the New Year with this easy to make noise maker!
What You'll Need:
  • 2 Paper Plates
  • A handful of dried beans
  • 1 streamer, strand of yarn, or ribbon
  • 1 dowel rod
  • KwikStix
  • Glue
Directions:
  1. Decorate the bottoms of your plates with any design you would like.
  2. Add the beans to the inside of one of the plates and attach the dowel rod from top to bottom.
  3. Cut the streamer, yarn, or ribbon and glue to the bottom near the dowel.
  4. Layer a thick line of glue around the rim of the plate and attach the 2nd plate on top.
  5. Let your noise maker sit for an hour or two to allow the glue to completely dry.
  6. Get ready for the clock to reach midnight and make a bunch of noise welcoming the new year!


Happy New Year!

December 22, 2016

Christmas Holiday Craft Idea

Paper Plate Christmas Tree 

Brought to you by:


Merry Christmas!

Materials
  • Paper Plate
  • Kwik Stix
  • Kid's Safety Scissors
  • Tape
  • Ribbon or yarn
  • Hole Punch
  • Stapler
  • Brown Cardstock Paper
  • Star Foam Sticker
  • Sequins
  • Glue

Instructions
  1.  Start by painting your paper plate green. Let it dry completely.
  2. When your paper plate is dry, cut it into thirds, then cut one of the section a bit smaller. When you layer them together with the smallest one on top, you have a Christmas Tree shape.
  3. Use your hole punch to punch six (6) holes across the bottom of each paper plate section.
  4. Cut a 12-inch section of ribbon for each paper plate section and lace them through the holes.  Start by bringing the ribbon up from the back of the paper plate into the first hole and then continue through the holes, finishing with the excess ribbon hanging off the back of the paper plate.
  5. Tape the excess pieces of ribbon to the back of the paper plate to hold them in place.
  6. When you are finished lacing all your pieces, use a stapler to staple them together into your Christmas Tree.
  7. Finish you Christmas Tree by stapling (or gluing) on a brown tree stump cut out from your brown paper and adding a foam star sticker at the top.
  8.  Glue on any sequin or embellishments that you would like to decorate your Christmas Tree.